Contributed by Dino Bijedic < dino.bijedic (at) eracom-tech (dot) com>
The following describes how to configure a site to site IPSec VPN tunnel between a Sonicwall (PRO 300) and m0n0wall.
Editor's note: I would suggest using Main mode rather than Aggressive.

Log in to Sonicwall
Click VPN -> Configure
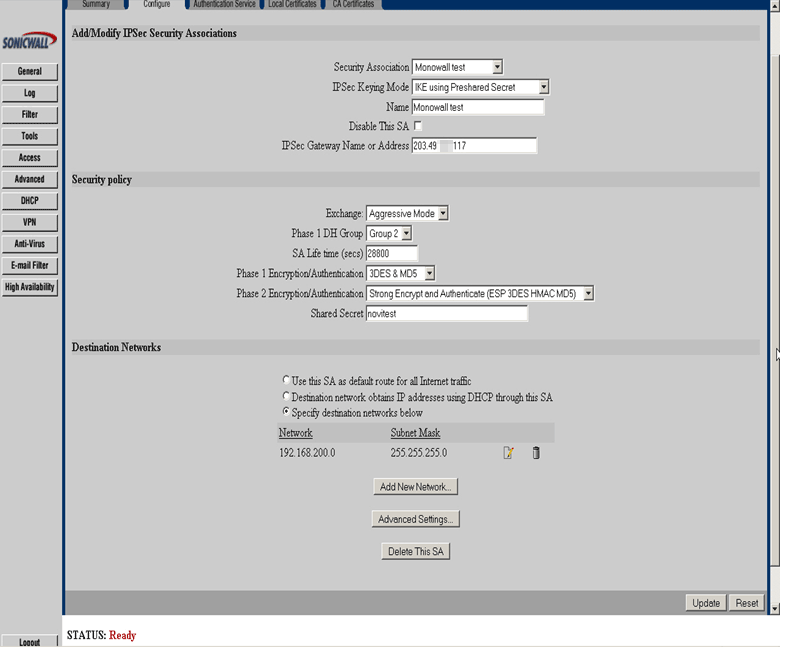
Add/Modify IPSec Security Association
In Configure, select Security Association -> Add New SA
Name: Name of connection (Monowall test)
IPSec Gateway Name or Address: Type IP address of your m0n0wall (203.49.X.117)
Security Policy
Exchange: Aggressive Mode
Phase 1 DH Group: Group2
SA Life time (secs): 28800
Phase 1 Encryption/Authentication: 3DES & MD5
Phase 2 Encryption/Authentication: Strong Encryption and Authentication (ESP 3DES HMAC MD5)
Share Secret: type your share secret (novitest)
Destination Networks
Select "Specify destination network below".
The following screenshot shows what this screen will look like.

Click Add New Network
You will get: Edit VPN Destination Network (Note: This is Popup window – enable Popup in your browser)
Network: type your destination network (192.168.200.0)
Subnet mask: Type destination subnet mask (255.255.255.0)
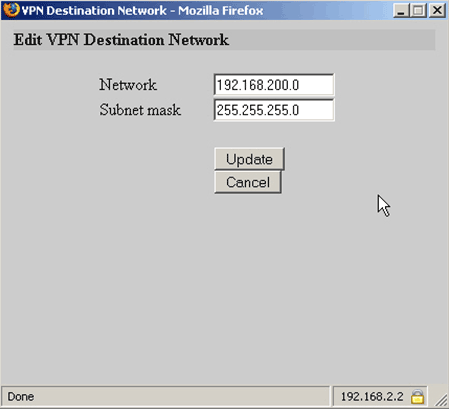
Click Update
Configure m0n0wall IPsec Edit Tunnel screen as follows.
Interface: WAN
Local subnet: LAN subnet
Remote subnet: 192.168.2.0/24
Remote gateway: 61.95.x.99
Description: Sonicwall
Negotiation mode: Aggressive
My identifier: My IP address
Encryption algorithm: 3DES
Hash algorithm: MD5
DH key group: 2
Lifetime: 28800
Pre-shared key: novitest
Protocol: ESP
Encryption algorithms: 3DES
Hash algorithms: MD5
PFS key group: off
Lifetime: 28800
Click Save at the bottom of the page to complete the VPN configuration.